28mm Buildings for Feudal Japanese Skirmish Games
To put it mildly, most of the 28mm Japanese buildings out there are a tad expensive, and I don't have a bottomless pool of funding. As a result, I did some hunting around the web to see how others had scratch build structures for this period. By far the best method I found was that of Jonas at Mura Miniatures. While he has some tutorials there, I found his lengthy string of posts here even more helpful in trying the method myself.
Anyway, below is a picture record of how I constructed my two most recent buildings using Jonas' method -- a high-roofed hut and simple merchants shop. Hopefully you'll find this helpful (or at least mildly interesting).
Step 1


First I construct the exterior walls with foamcore. I'm fortunate to have a friend who owns a framing shop, and anytime I need some I can get a box full of his scraps. The designs for the buildings I'm making are very simple, so they needed no advance planning, but you can get as complex as you like (the roofs will be the challenge if you get too fancy.) I've found that wood glue is the best for holding foamcore together, and its thickness allows me to assemble things and have them stay mostly in place even right after I've applied it.
Step 2

Next I add a few internal supports (to prevent warping when I paint) and some exterior wood paneling and windows. For the wood paneling and window frames I use strips of cereal box cardboard, and I cut it roughly for the rustic look. I then use a hobby awl to scrape wood-grain patterns into the cardboard. This sounds tedious, but it doesn't take much pressure to make the marks and I do it really quickly. No need to sweat this detail. Again, I attach the cardboard with wood glue.
If you want additional detailing on more up-scale buildings, you can use wood dowling available at craft stores to do things like windowsills and door frames.
Step 3

Next I prime the cardboard for painting. As with everything else, I use Liquitex Gesso as primer -- this time in black. I don't prime the bare foamboard since that will get covered in the next step anyway.
Step 4


For the next step I smear a light coating of Elmer's wood filler over the bare foamcore. This gives the exposed foamcore a rough, adobe or wattle and daub texture.
Step 5

To finish up the walls of the building (I won't be doing interiors this go 'round) I simply paint the wood filler a sandstone color,the wood paneling a dark brown, and then drybrush the wood paneling with a tan paint to age it a bit.
Step 6


Next I move on to the roofs. For the interior supporting structure I use .030 sheet styrene. It's easy to cut and more than sturdy enough. you don't need to worry too much about making the joints fit exactly or even attaching the panels with that much glue (for some parts I just use scotch tape). While the styrene provides the structure during construction, the "thatching" itself will actually be what makes the roof sturdy when construction is complete.
Step 7


About that thatching...to get the effect I cut strips of washcloth and, liberally using woodglue, attach them to the styrene structure. Start at the bottom and work up if you want the overlapping effect. While you want to get the seams close and touching, you don't need to make them invisible at this stag, since you will be covering all of this up with paint soon and the seams will disappear at that point.
When selecting your material I have two pieces of advice -- 1) get a shade of brown since any bits that are not totally covered in the next step will simply blend in, and 2) don't get really plush material. I got a pack of scraggly looking washcloths at the local discount store for these buildings and it worked great but only atfter first trying a nice, plush towel material. The plush material didn't harden up very much, even with layers of paint, and also didn't end up looking like thatching at this scale.
Step 8

Next prime with black Gesso. Because I used a brown cloth, it doesn't matter if some spots peek through.
Step 9
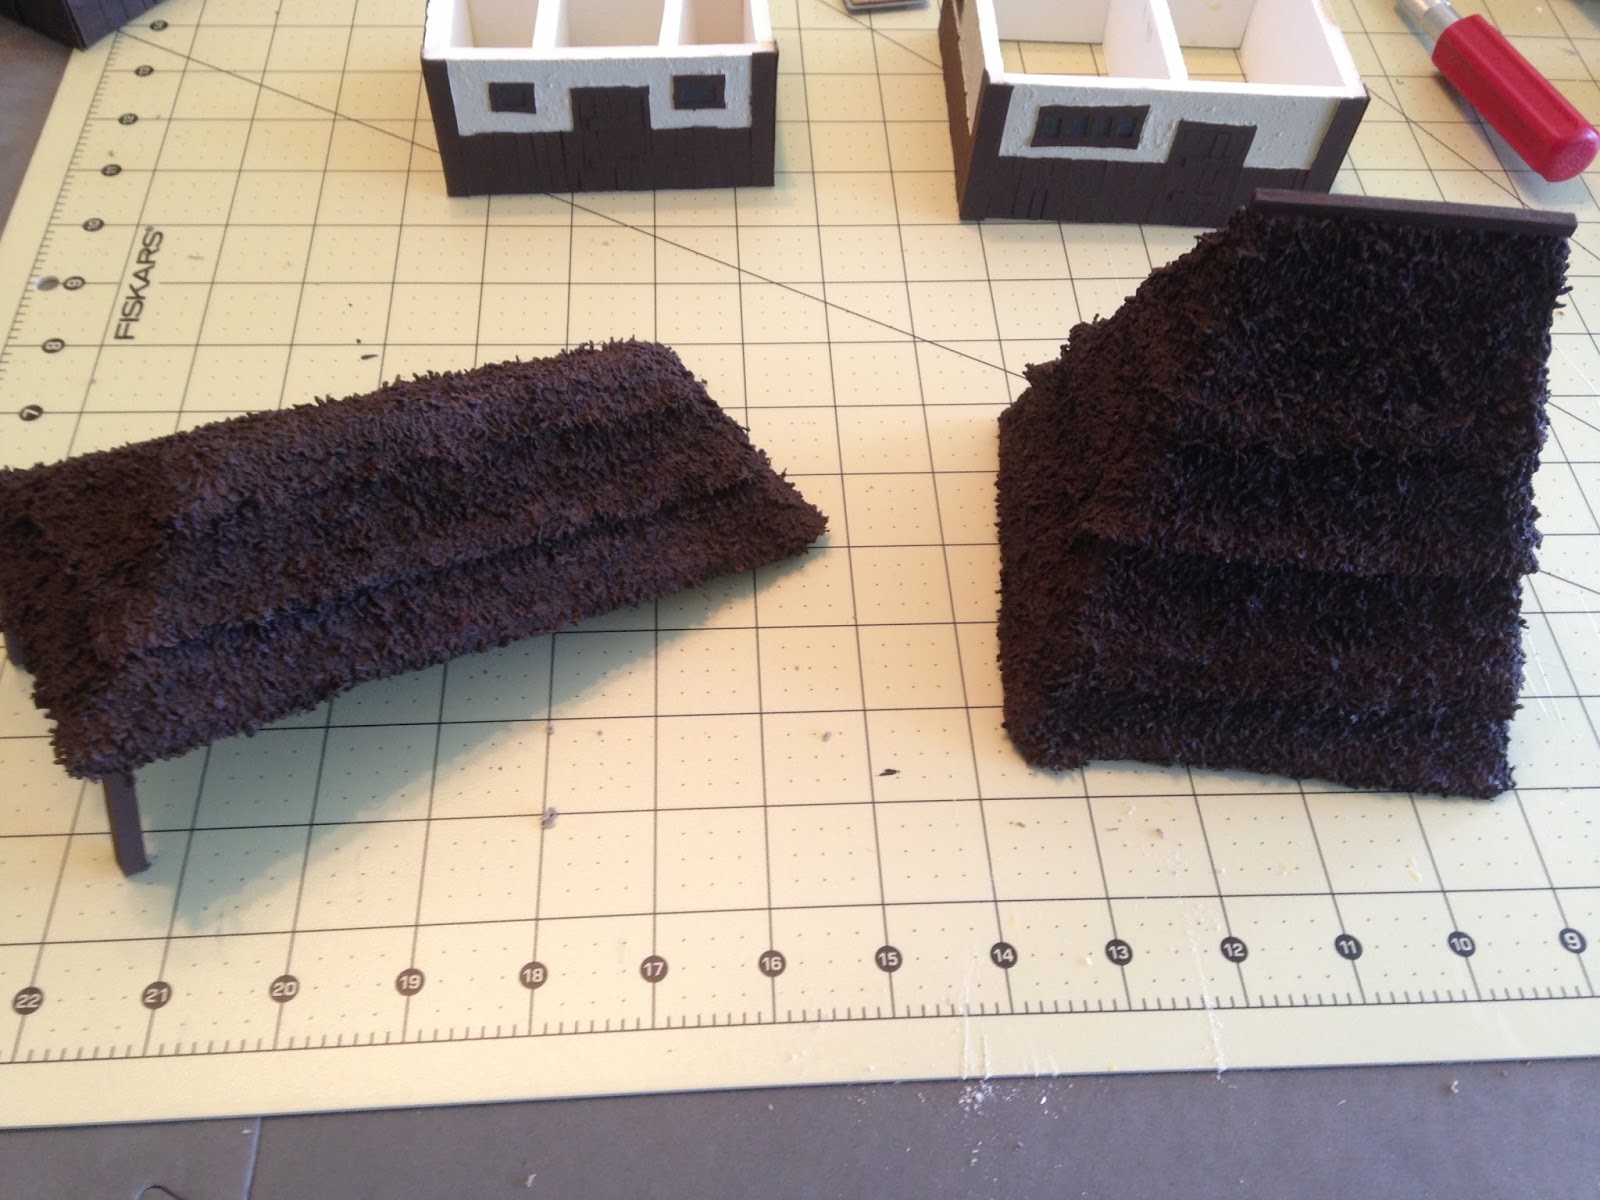


Next I just heavily dry brush three layers of progressively lighter and lighter browns and tans. The key is NOT working each color layer into every nook and cranny of the primed washcloth, but you don't just want a light coating either. Just use your own preference to decide how heavy to make each layer. As you can see, I also added some painted wood dowling for support under the roof on the left, and at the top of the roof on the right.
And we're done!

Depending on what your buildings are meant to represent you may want to add a couple of more details (like my hanging banners on the shop), or go ahead and detail the interiors, but by and large that's it -- my buildings are ready to hit the table. This method is quick and easy, and I made these over the course of about three days in small spurts of 30-60 minutes here and there when I could fit it in amongst other activities.
If you'd like to see the buildings in action on the table top, check out this review and AAR of my club playing a game of Osprey's Ronin rules.
Nevermind my reply to your other post....this is an excellent tutorial!
ReplyDeleteThanks!
Exactly what I´m looking for my own Ronin table, thx for sharing this nice tutorial.
ReplyDeleteHopefully mine will come out then yours.
cheers from austria